
So you're curious about what is dehydrate in air fryer and if your kitchen gadget can do more than just make things crispy. It turns out, most air fryers are surprisingly capable of gently drying out food, turning fruits into chips or herbs into potent flavor bombs. It’s not quite the same as a dedicated food dehydrator, but it’s a neat trick to have up your sleeve, especially for smaller batches.
Manufacturer specifications for many popular air fryer models indicate they can achieve and maintain consistent temperatures as low as 150°F (65°C), which is crucial for successful dehydration without cooking. Getting this low temperature right allows moisture to evaporate slowly, preserving the food's integrity and nutrients. Let’s dive into how it works.
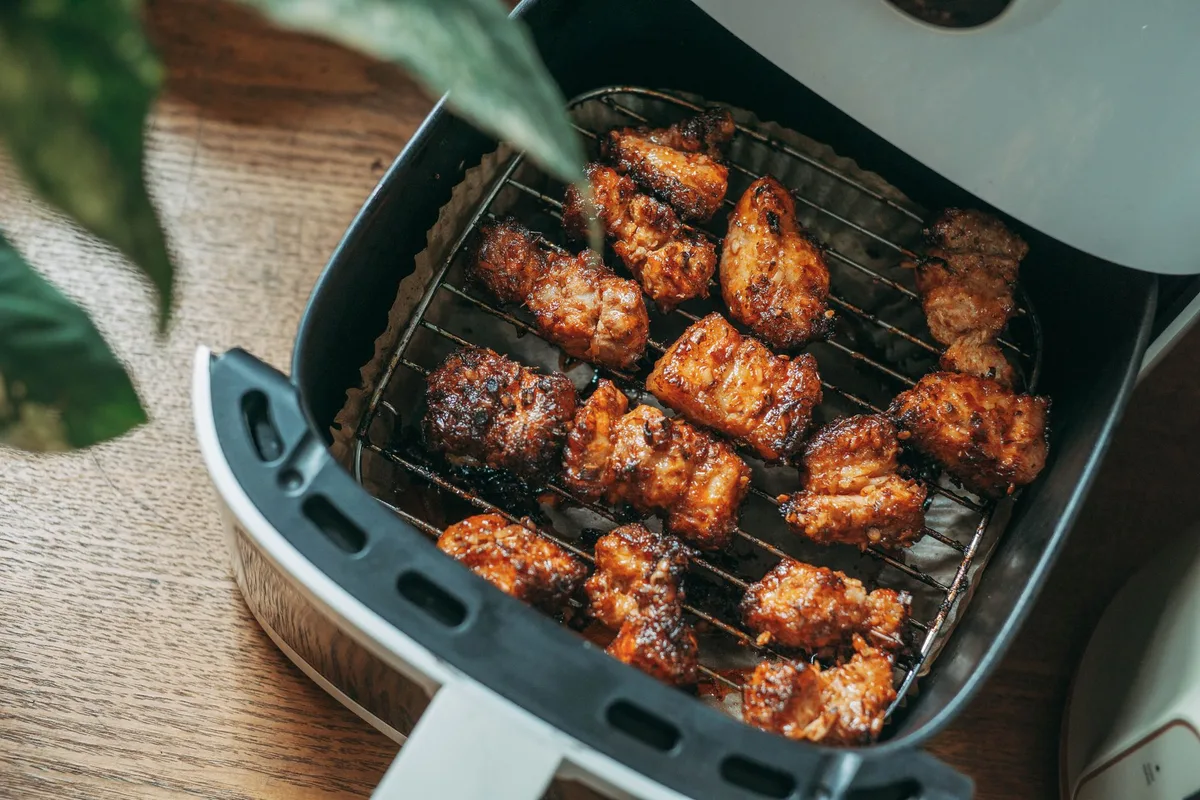
What "Dehydrating" Really Means in Your Air Fryer
When we talk about dehydrating food, we're essentially talking about removing as much water content from it as possible. We want to get it dry enough that it won't spoil quickly, giving you a shelf-stable snack or ingredient. In an air fryer, this means setting it to a low temperature and letting it run for an extended period. You're not cooking it in the traditional sense; you're drying it out.
This low and slow approach is key, mimicking the function of much larger, dedicated appliances.
The goal is moisture removal, not cooking, so the temperature needs to be carefully managed. Per FDA guidelines for low-temperature food preservation, temperatures should generally stay below 140°F (60°C) for raw meats and poultry to inhibit bacterial growth, but for fruits, vegetables, and herbs, slightly higher temperatures (around 150-160°F or 65-71°C) are common for effective drying. However, it's important to note that air fryers don't always achieve the precise temperature control of a commercial dehydrator, which is why visual inspection is so vital.
Why Visuals Are Your Best Friend for Air Fryer Dehydration
Honestly, if I could show you right now, I would! Seeing a picture of perfectly dehydrated apple chips next to one that’s still a little chewy makes all the difference. It's hard to capture the exact texture and translucency in words alone. For example, when a mushroom slice is properly dehydrated, it should look noticeably thinner and feel almost papery.
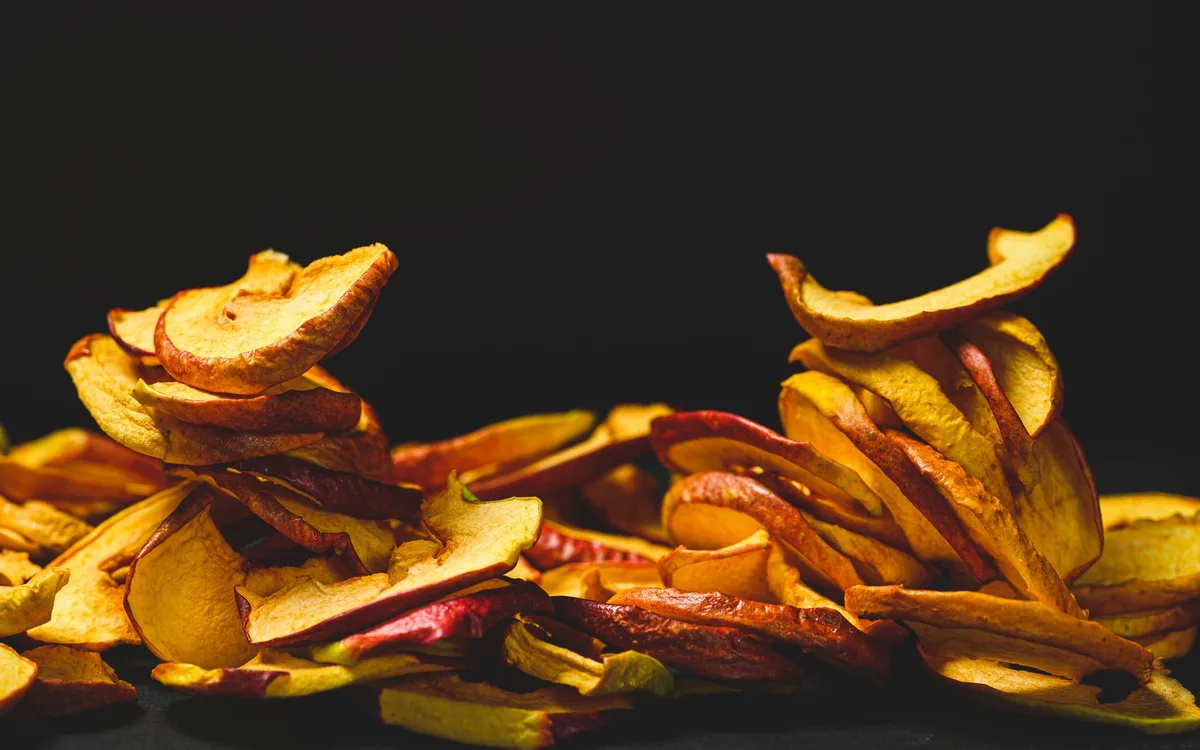
This is where your eyes and your sense of touch become your most reliable tools. Relying solely on timers can be misleading because the moisture content of food varies, and air fryer performance can differ. You need to learn the visual cues of dryness.
Seeing Is Believing: What Done Looks Like
When your food is properly dehydrated, it loses its vibrant, watery sheen. Fruits will become less plump and may curl slightly at the edges. Herbs will feel brittle and easily crumble between your fingers. For something like jerky, it should be firm yet pliable, with no lingering stickiness or moisture.
The coloration will typically deepen and become more muted, a sign that the water has been successfully removed.
What You'll See When It's Not Quite Right
On the flip side, under-dehydrated food will still feel soft, spongy, or have a noticeable chewiness that indicates moisture remains. This is a significant problem because it vastly reduces the food's shelf life and poses a risk of mold growth. Conversely, over-dehydrated food might look shriveled and brittle, possibly with burnt edges if the temperature was too high or the time too long.
Essential Air Fryer Settings for Dehydration
Using your air fryer for dehydration isn't about blasting heat; it's about a gentle, prolonged drying process. This means understanding how to adjust its core functions.
Temperature: Low and Slow is Key
The most critical setting for dehydrating in an air fryer is the temperature. You need to set it as low as possible. Many air fryers can reach temperatures around 150°F (65°C) or even lower. This low heat is essential to evaporate moisture without cooking or burning the food.
For context, most ovens start at around 170°F (75°C) for their lowest "warm" setting, so air fryers often have an advantage here for this specific task.
If your air fryer doesn't have a specific dehydrate setting, you'll manually set the temperature to its lowest possible dial. It's crucial to ensure this low temperature is maintained consistently.
Time: Patience is a Virtue Here
Unlike cooking, where times are often measured in minutes, dehydration takes hours. Depending on the food type, thickness, and humidity, you might be running your air fryer for anywhere from 4 to 12 hours, sometimes even longer. This is a significant difference from typical air fryer cooking times of 15-30 minutes.
It’s not a process you can rush. You’ll need to check on the food periodically, especially as you approach what you think is the dry point, to prevent over-drying.
Getting Ready: Food Prep for Dehydration
Proper preparation is half the battle when you're looking to dehydrate food in your air fryer. This involves how you handle and cut your ingredients.
Slicing and Arranging Your Food
Uniformity is key. All pieces of food should be cut to a similar thickness. This ensures they dry at the same rate. For fruits like apples or bananas, aim for slices about 1/8 to 1/4 inch thick.
For vegetables, adjust based on density; root vegetables might need to be thinner than bell peppers.
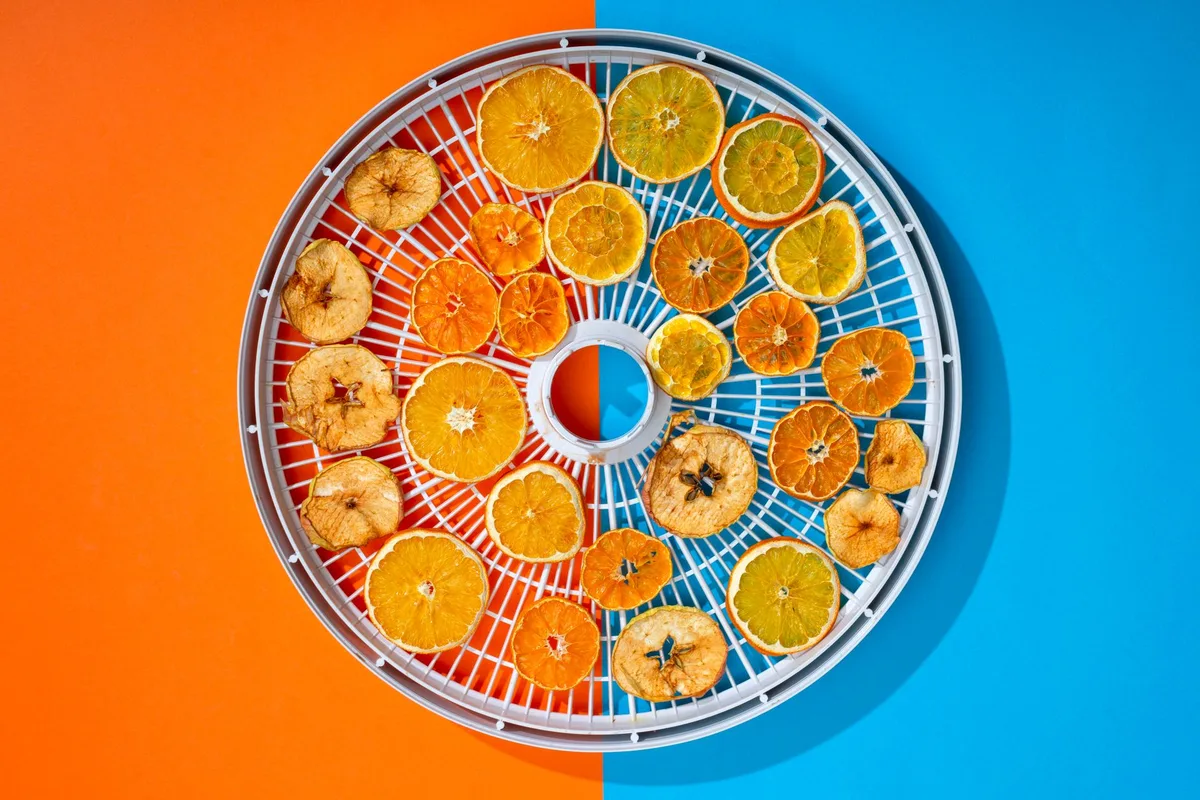
When you load the air fryer basket or tray, don't overcrowd it. Food should have space between pieces to allow air to circulate freely. If pieces are touching, they won't dehydrate efficiently and can lead to uneven results. Some air fryers come with stacking racks that can be incredibly helpful for increasing capacity, but even then, avoid packing them too tightly.
The Step-by-Step Air Fryer Dehydration Process
Using your air fryer for dehydration is straightforward, but it requires attention to detail. It's about setting the right conditions and then monitoring the transformation.
Step 1: Prep and Load
Begin by preparing your chosen food. Wash fruits and vegetables thoroughly. Slice them uniformly, aiming for consistent thickness across all pieces, ideally between 1/8 and 1/4 inch. If you're making jerky, ensure it's cut thinly against the grain.
Pat the food dry with a paper towel to remove excess surface moisture. Arrange the pieces in a single layer in your air fryer basket or on any racks you might be using. Ensure there's space between each item for air circulation. Do not overcrowd the basket; this is a common mistake that hinders proper drying.
Step 2: Set Your Air Fryer
Set your air fryer to its lowest possible temperature, typically around 150-180°F (65-82°C). If your air fryer has a dedicated "dehydrate" setting, use that as it’s designed for this purpose. If not, manually select the lowest heat setting. Set the timer for a longer duration, start with 4-6 hours, but be prepared to extend it significantly.
The exact time will depend heavily on the food type, thickness, and your specific air fryer model. Consider placing a parchment paper liner (with holes poked in it for airflow) at the bottom of the basket to catch any drips if needed, though be mindful that too much blockage can impede airflow.
Step 3: Monitor and Check
This is arguably the most critical part. Check your food every hour or two, especially after the first 3-4 hours. Gently touch the pieces to feel for dryness. They should no longer feel moist, pliable (unless it's jerky), or have a steamy feel.
Bent pieces should snap or feel brittle, not fold. If some pieces are drying faster than others, rearrange them to promote even dehydration. You might need to adjust your air fryer's position to ensure even airflow distribution if you notice one side is drying more rapidly.
Step 4: Cool and Store
Once the food has reached your desired level of dryness, turn off the air fryer and remove the food. Let it cool completely on a wire rack at room temperature. This cooling period is important; sometimes food can feel done in the warm air fryer but will become even drier as it cools. Once completely cool, store the dehydrated items in airtight containers, such as glass jars or vacuum-sealed bags.
For best results and to prevent moisture reabsorption, store them in a cool, dark, and dry place. Check the package of your chosen storage containers for specific recommendations on humidity control.
Common Mistakes When Dehydrating in an Air Fryer
While dehydrating in an air fryer is convenient, it's easy to make a few missteps that can ruin your batch. Knowing these common errors can save you time and disappointment. It’s less about complex technique and more about avoiding simple oversights that even experienced home cooks can fall into.
Burning vs. Drying
The biggest pitfall is setting the temperature too high. Air fryers are designed for rapid convection heat, which is great for crisping but can quickly turn delicate foods like herbs or fruit slices into charcoal if you're aiming for dehydration. If you see browning or blackening, your temperature is likely set too high or the food is too close to the heating element. Remember, dehydration is a slow evaporation process, not a fast cooking one.
Incomplete Drying Risks
On the flip side, not drying food thoroughly presents a significant risk. If food remains too moist, it can quickly develop mold and bacteria, making it unsafe to consume. This is particularly concerning with low-acid foods like fruits and vegetables. Aggregate user feedback reports that under-dehydrated products often spoil within days, even when stored in airtight containers, when they would typically last weeks or months if properly dried.
Air Fryer Dehydration vs. Dedicated Dehydrators
If you’re serious about dehydrating larger quantities or a wide variety of foods regularly, you might wonder how your air fryer stacks up against a dedicated food dehydrator. They serve the same core purpose but operate differently. A dedicated dehydrator is typically designed with multiple trays for maximum capacity and often features a thermostat that maintains a very precise low temperature, crucial for food safety as per the FDA's recommendations.
Air fryers, on the other hand, are primarily designed for faster cooking methods. While many can achieve low temperatures, their heating elements and fan systems are optimized for crisping, not for the hours-long, gentle moisture removal that a dehydrator excels at. If you plan to dehydrate more than a handful of apple slices or a small batch of herbs at a time, a dedicated unit might be a more efficient investment.
What Foods Work Best for Air Fryer Dehydration?
Not all foods are equally suited for air fryer dehydration. Certain items perform much better than others due to their moisture content and density.
Fruit Leathers and Chips
Fruits like apples, bananas, pears, and berries are fantastic candidates for air fryer dehydration. Their natural sugars help them caramelize slightly, and they transform into delicious, chewy chips or can be blended into fruit leathers. Because they are naturally high in sugar, they also have a slightly higher resistance to spoilage. Ensure you slice them thinly and evenly for the best results.
Drying Herbs and Veggies
Herbs such as basil, mint, oregano, and parsley dry beautifully in an air fryer. Their delicate leaves lose moisture quickly and retain much of their flavor. Vegetables like zucchini, bell peppers, and even thicker items like sweet potato slices can also be dehydrated, though they will require longer drying times and careful monitoring to ensure they don't become tough or burnt.
Making Air Fryer Jerky
Jerky is another popular item to attempt in an air fryer, but it requires careful attention to food safety. It's essential to use lean cuts of meat and slice them thinly against the grain. Some research suggests marinating meat for jerky can also help in flavor and preservation. Because meat is a high-risk food for bacterial growth, ensuring it reaches a safe internal temperature and is thoroughly dehydrated is paramount.
If your air fryer cannot reliably maintain a temperature of at least 160°F (71°C) for meat products, it’s safer to use a dedicated dehydrator or oven for jerky. Always consult food safety guidelines from sources like the USDA for meat preservation.
Expert Tips for Better Air Fryer Dehydration
To get the most out of your air fryer for dehydration, a few pro techniques can make a big difference. These aren't complicated but require you to pay attention to the process.
- Preheat If Necessary: Some manufacturers recommend preheating the air fryer for a few minutes to reach the desired low temperature before adding food. This can help ensure a more stable initial temperature.
- Rotate and Flip: Even with good airflow, rotating the basket or flipping the food halfway through the process can promote more even drying. This is especially helpful if you don’t have a model with multiple racks or a large basket.
- Adjust for Humidity: Dehydrating times can be affected by ambient humidity. On a very humid day, food might take longer to dry, so be prepared to extend cooking times and check the food more frequently.
- Use Liners Wisely: While parchment paper liners can catch drips, make sure they have plenty of holes for air circulation. Solid liners will block airflow and hinder the dehydration process. Perforated liners or silicone mats designed for air fryers are often a better choice.