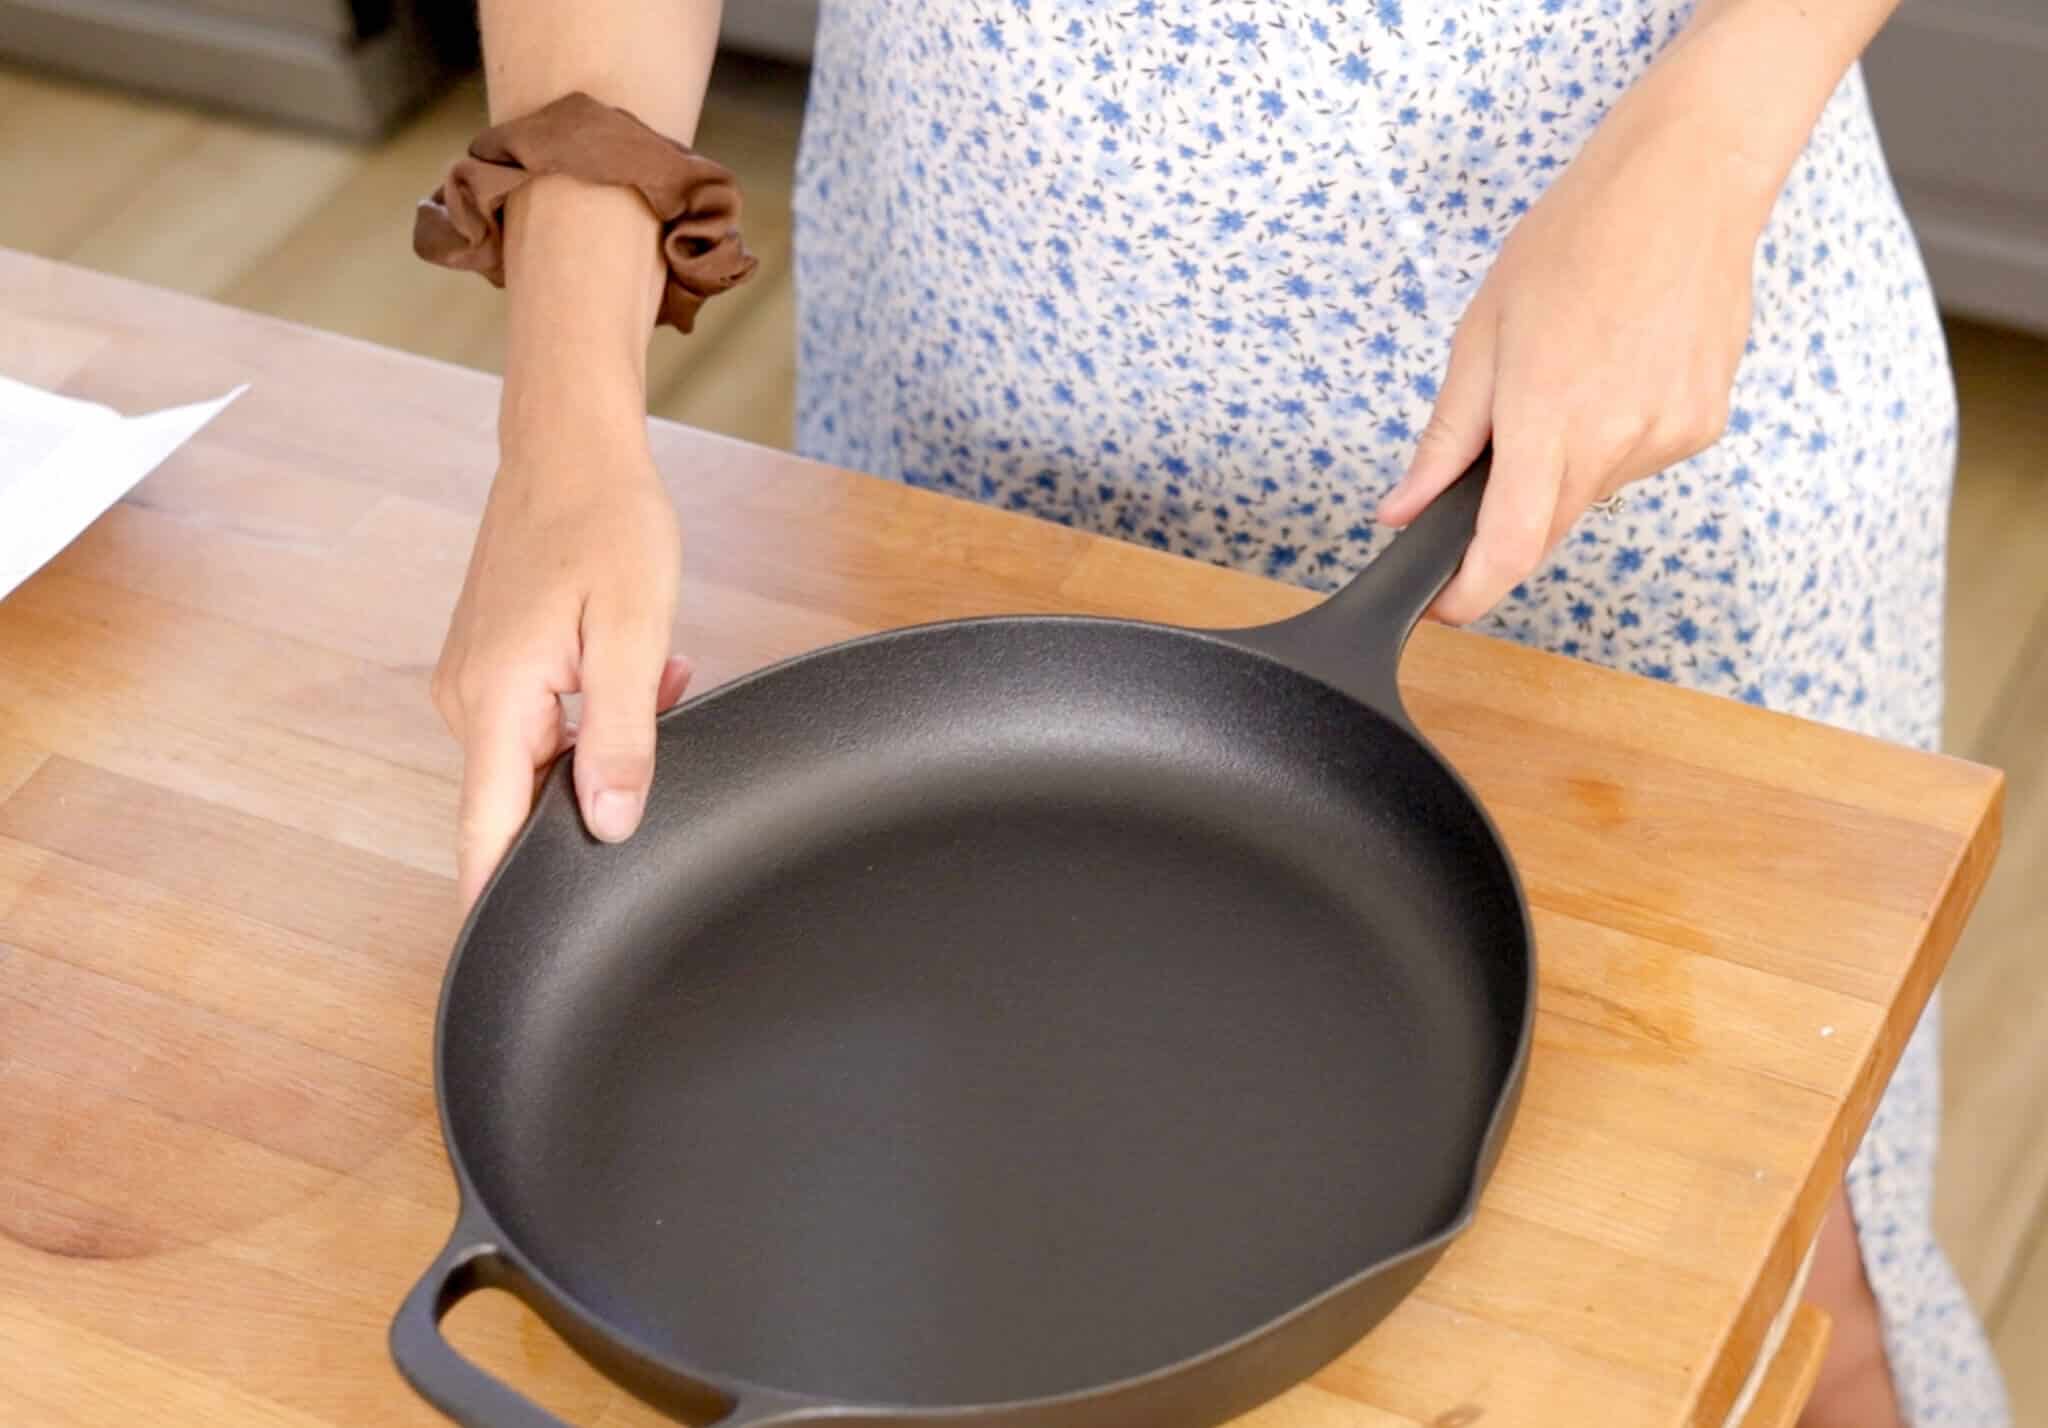
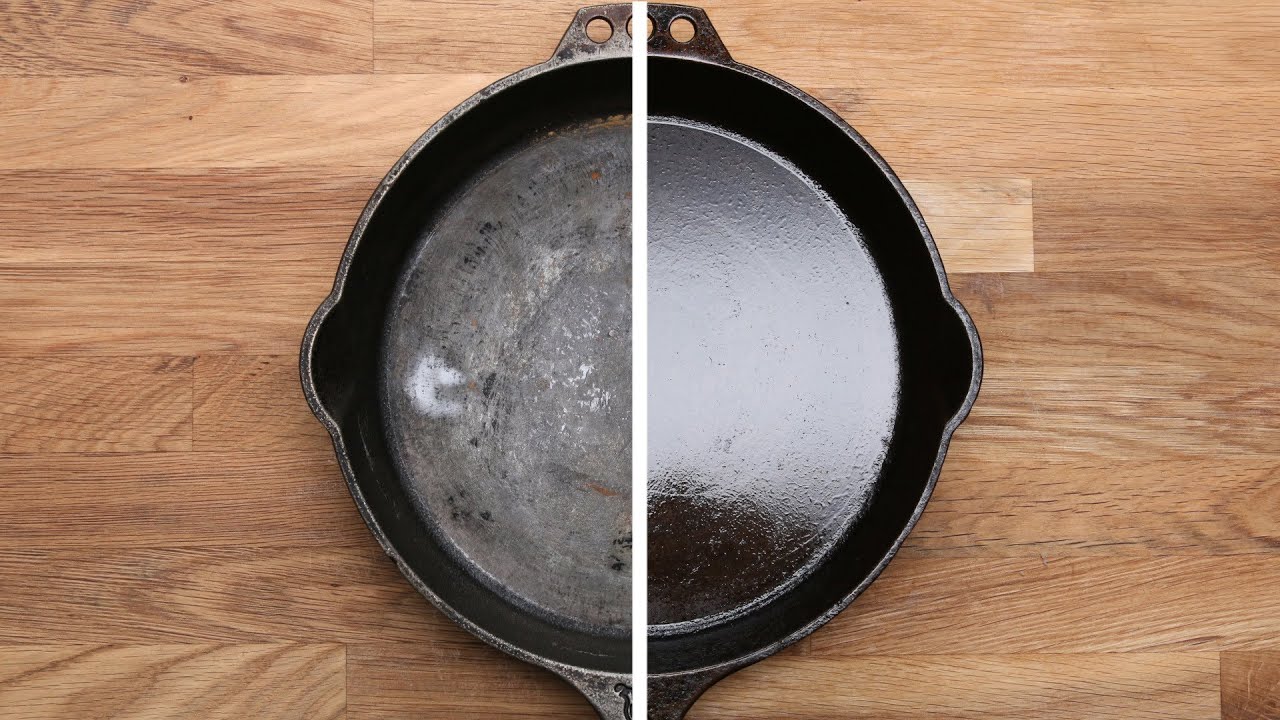
To use cast iron cookware, start with a clean, seasoned pan, preheat it slowly, add cooking oil, and cook over moderate heat. After cooking, wash it by hand, dry it completely, and apply a very thin layer of oil to prevent rust.
In American kitchens, cast iron skillets are common tools for cooking burgers, frying eggs, making cornbread, and roasting vegetables. They work on gas and electric stoves, induction cooktops, grills, and in ovens when the cookware is designed for those uses. Their main strength is heat retention, which helps food brown well and stay hot.
Still, a cast iron pan works a little differently from a modern nonstick skillet. It takes time to heat, holds heat for a long time, and needs a dry storage space. The good news is that its care routine is simple once you learn the basics. You do not need special cleaners or expensive products to use one well.
This guide explains how to prepare a new pan, build and protect its seasoning, choose the right cooking heat, prevent food from sticking, and clean it after every meal. It also covers common problems, including rust, sticky surfaces, uneven seasoning, and food that refuses to release.
Cast iron cookware is made mainly from iron with a small amount of carbon and other elements. It is thick, heavy, and able to hold heat for a long time. This makes it useful for foods that need steady heat, such as steak, chicken, roasted potatoes, and cornbread.
Unlike thin aluminum pans, cast iron does not respond as quickly when you change the burner setting. It takes longer to heat up and cool down. Think of it like a warm brick: once it gets hot, it stays hot for a while.
This feature can help you get a good sear on meat and brown food evenly when you use the right heat. However, it also means you should avoid turning the burner to high right away. A gradual start gives the pan more time to warm up.
Source: redandhoney.com
Heat retention
Cast iron holds heat well after it gets hot. This helps maintain cooking temperatures when you add food to the pan.
Natural seasoning
A thin layer of baked-on oil protects the iron and creates an easier-release cooking surface.
Versatile cooking
Suitable cast iron cookware can move between a stovetop, oven, grill, and some outdoor cooking setups.
Long service life
With proper cleaning, drying, and seasoning, a cast iron pan can remain useful for many years.
What Does Seasoning Mean?
Seasoning is a thin layer of oil that has been heated until it forms a hard protective coating on the iron. This process is called polymerization. The oil changes from a liquid into a bonded layer that helps reduce rust and food sticking.
Seasoning is not the same as adding a fresh layer of cooking oil before every meal. Cooking oil is a temporary liquid that helps food cook. Seasoning is the hardened coating that stays on the pan after the oil has been heated properly.
A well-used pan often develops a dark, smooth-looking surface. However, a pan does not need to look perfectly black or shiny to work properly. Small changes in color and texture are normal.
Good seasoning
The surface feels dry and smooth rather than greasy or sticky.
Weak seasoning
Food sticks easily, bare metal may appear, or rust may develop.
2. Prepare Your Cast Iron Cookware Before First Use
Before cooking, check whether your cast iron pan comes pre-seasoned. Many modern skillets sold in the United States already have a factory-applied seasoning layer. These pans do not need a full seasoning treatment before their first meal.
If the manufacturer says the cookware is ready to use, wash it briefly with warm water, dry it well, and start cooking. If the pan is unseasoned, follow its care instructions and apply seasoning before use.
Older secondhand cookware may need more attention. Check it for loose rust, thick food buildup, cracks, and damaged areas. A little surface rust can often be repaired, but a cracked pan should not be used for cooking.
Source: i.pinimg.com
Warm water
Use warm water to remove dust and loose material from a new pan.
Mild dish soap
A small amount of modern dish soap is suitable for cleaning seasoned cast iron.
Soft brush or sponge
Use a brush or nonabrasive scrubber to remove loose residue.
Clean towel
Dry every surface before storing or cooking with the pan.
How to Check Whether a Pan Is Ready to Use
Look at the cooking surface under good light. A seasoned pan should have a protective coating without large areas of exposed, orange-colored rust. The surface may look slightly uneven, especially on a new skillet.
Run a clean, dry paper towel over the surface. A little dark residue can occur with new seasoning, but thick flakes, loose rust, or large amounts of food buildup should be cleaned before cooking.
If the pan has a sticky coating, do not assume it needs more oil. Too much oil can create a tacky surface. Clean it, dry it, and assess whether it needs a fresh seasoning layer.
Ready
The pan has an intact protective surface and no loose rust or food residue.
Needs cleaning
The pan has dust, grease, loose food, or surface buildup.
Needs repair
The pan has significant rust or damaged seasoning that requires restoration.
Do You Need to Season a New Cast Iron Pan?
Not always. If your pan is labeled pre-seasoned, it is generally ready to use after a quick wash and thorough dry. Cooking with a little oil helps maintain and gradually improve its surface.
An unseasoned pan needs an initial seasoning treatment. Read the manufacturer’s directions because the recommended oven temperature and process can vary by product.
Pre-seasoned cookware
Wash, dry, and begin cooking.
Unseasoned cookware
Apply a thin layer of suitable cooking oil and follow the manufacturer’s seasoning instructions.
3. How to Season Cast Iron Cookware Properly
Seasoning creates the protective surface that makes cast iron easier to cook with and helps prevent rust. You may need to season a new uncoated pan, restore a damaged surface, or improve an older skillet.
For this process, use a neutral cooking oil with a suitable high smoke point, such as refined vegetable or canola oil. You only need a small amount. A thick layer of oil can turn sticky instead of forming a smooth coating.
A properly seasoned pan should feel dry after cooling. It should not have pools of oil or a wet, tacky finish. Follow the oven limits listed by the cookware manufacturer.
Source: sharonpalmer.com
Vegetable oil
An affordable and widely available option for building seasoning.
Canola oil
A neutral oil with a suitable smoke point for many home seasoning methods.
Refined grapeseed oil
Another option when its smoke point and the manufacturer’s instructions suit the seasoning process.
Step-by-Step Oven Seasoning Method
Start by washing the pan with warm water and a little dish soap. Remove dirt, loose rust, and old food residue. Dry it completely with a towel.
Apply a small amount of vegetable or canola oil to the entire pan. Spread it over the cooking surface, sides, bottom, and handle if those areas are bare iron. Use a clean paper towel to wipe away excess oil until the pan looks almost dry.
Place the cookware upside down on the center oven rack. Put a baking sheet or foil on the lower rack to catch any drips. Preheat the oven according to the manufacturer’s directions. A commonly used method is 450–500°F for about one hour.
After the heating period, turn off the oven and let the cookware cool inside. Use suitable heat protection when handling the pan. One properly completed cycle may be enough for maintenance, while a badly worn pan may need additional cycles.
Step 1: Clean
Wash the cookware and remove rust, dirt, and old food.
Step 2: Dry
Remove all visible moisture before applying oil.
Step 3: Apply oil
Rub a very thin layer over all exposed iron surfaces.
Step 4: Bake
Heat the pan upside down for about one hour at the temperature specified by the care instructions.
Step 5: Cool
Allow the cookware to cool safely before handling or storing it.
How Often Should You Season Cast Iron?
There is no fixed seasoning schedule for every pan. A well-maintained skillet may only need occasional oven seasoning. Regular cooking with oil, followed by proper cleaning and drying, helps maintain its coating.
Consider reseasoning when food begins sticking more than usual, bare metal appears, rust develops after cleaning, or the protective coating becomes patchy and damaged.
Do not season simply because the pan has a few lighter or darker spots. Uneven color does not always mean poor performance.
Regular use
Cooking with a little oil helps maintain the existing seasoning.
Minor dullness
Clean the pan, dry it, and continue normal cooking if the coating remains intact.
Damaged coating
Clean and reseason the pan when bare iron, rust, or persistent sticking appears.
4. How to Cook With Cast Iron Cookware
The best way to cook with cast iron is to preheat it slowly, add a little oil, and adjust the heat as needed. Do not treat it like a thin nonstick pan. Cast iron needs more time to warm up, but it also keeps its heat longer.
Start with medium-low heat for most stovetop cooking. The exact setting depends on your stove, the pan size, and the food. Once the pan reaches the right temperature, you can raise or lower the heat as the recipe requires.
A common mistake is turning the burner to high because the pan seems slow to heat. This can create hot spots and burn food before the rest of the cooking surface becomes warm. Patience usually gives better results.
Source: i.pinimg.com
Preheat gradually
Give the pan a few minutes to warm up rather than exposing it to sudden, intense heat.
Add cooking fat
Use a small amount of oil or another suitable fat before adding food.
Control the temperature
Start with moderate heat and adjust it based on the food and cooking method.
Allow food to release
Give meat and other foods time to brown before trying to move them.
Step 1: Choose the Right Burner
Use a burner that is close to the size of the pan’s base. A burner that is too small may heat the center much faster than the edges. A burner that is too large can expose the sides and handle to unnecessary heat.
For a large skillet, a larger burner may provide more even heating. On an electric or induction cooktop, gradual temperature changes are especially useful because cast iron retains heat after you lower the setting.
Gas stove
Keep the flame under the pan base rather than allowing it to climb the sides.
Electric stove
Allow extra time for gradual heating and cooling.
Induction stove
Use an induction-compatible pan and begin with a moderate setting.
Step 2: Preheat the Pan Slowly
Place the dry skillet on the burner and begin at low or medium-low heat. Let it warm for a few minutes. The time depends on the thickness of the pan and the power of the burner.
If you are searing meat, you may need a hotter cooking surface. Increase the heat gradually rather than starting at maximum power. A drop of water can help you judge whether a pan is heating, but avoid splashing water into hot oil.
A properly heated pan should be warm across much of its cooking surface. It should not smoke heavily before you add the food.
For eggs
Use low to medium-low heat to reduce sticking and prevent overcooking.
For vegetables
Use medium heat and adjust it to control browning.
For steak
Preheat gradually, then use suitable higher heat for searing.
Step 3: Add Oil or Cooking Fat
Once the pan is warm, add a thin layer of cooking oil. Canola, vegetable, avocado, and other suitable cooking oils can work, depending on the recipe and temperature.
Butter can also be used, but it can burn at high temperatures. For a hot sear, begin with an oil that suits the cooking temperature and add butter later for flavor if desired.
Avoid adding a large amount of oil just because the pan is cast iron. A light, even coating is usually enough for sautéing and frying.
Eggs and pancakes
Use a little butter or cooking oil over moderate heat.
Steak and burgers
Use a suitable high-smoke-point oil for high-temperature searing.
Vegetables
Use enough oil to lightly coat the ingredients and support browning.
Step 4: Add Food and Avoid Moving It Too Soon
Place dry food in the pan when possible. For example, pat steak and chicken dry before cooking. Excess surface moisture can create steam and reduce browning.
Once food touches the hot cooking surface, allow it to cook before trying to turn it. Meat often releases more easily after a browned crust develops. If it feels stuck, give it a little more time instead of scraping it forcefully.
Avoid filling the pan too tightly. Too much food can lower the surface temperature and cause ingredients to steam instead of brown.
Do not overcrowd
Cook in batches when necessary to maintain enough space around the food.
Use suitable utensils
Wood, silicone, and metal utensils can be used on traditional bare cast iron. Avoid damaging the seasoning with careless scraping.
Watch the heat
Lower the burner if food browns too quickly or oil begins smoking excessively.
Step 5: Finish Cooking Safely
Some recipes benefit from moving a cast iron skillet from the stovetop to the oven. This works well for thick steaks, baked cornbread, roasted vegetables, and certain chicken dishes.
Before using the oven, check the cookware instructions. Traditional cast iron pans are usually oven-safe, but lids, knobs, and handles on some products may have temperature limits.
Always use a dry, heat-resistant oven mitt when handling hot cast iron. The handle can become extremely hot even when it looks cool.
Check oven limits
Follow the maximum temperature for the pan, lid, and any removable parts.
Protect your hands
Use a suitable oven mitt or handle cover whenever the cookware is hot.
Use a safe surface
Place hot cookware on a heat-resistant trivet or suitable surface.
5. What Foods Are Best to Cook in Cast Iron?
Cast iron is especially useful for foods that benefit from steady heat and good browning. Its ability to retain heat makes it a practical tool for American home cooking, from weekend breakfasts to grilled-style dinners prepared indoors.
However, not every recipe is equally suitable for every pan. A new skillet with a weak seasoning layer may struggle with eggs and acidic sauces. Start with foods that use a little oil and do not contain large amounts of acidic ingredients.
Source: campfiresandcastiron.com
Steak and burgers
The hot surface helps develop a browned exterior. Preheat gradually and avoid overcrowding.
Chicken
Cast iron can brown chicken pieces well before they finish cooking on the stovetop or in the oven.
Cornbread
A hot, lightly greased skillet can help form a crisp, browned crust.
Roasted vegetables
Potatoes, carrots, onions, and similar vegetables can develop good color with moderate heat and oil.
Pancakes
A properly seasoned pan works well for pancakes when the heat stays moderate.
Bacon
Bacon releases fat as it cooks, which can help maintain the cooking surface.
Can You Cook Eggs in Cast Iron?
Yes. Eggs can cook well in cast iron when the pan has good seasoning and the heat is controlled. Start with a clean skillet and warm it over low or medium-low heat.
Add butter or a small amount of oil before adding the eggs. Let the pan warm evenly and avoid using very high heat. If eggs stick badly, the pan may be too hot, the seasoning may need attention, or you may need a little more cooking fat.
A new pan may need regular use before it performs well with delicate foods. Try cooking vegetables, potatoes, or other forgiving foods while its seasoning develops.
Use lower heat
Eggs cook quickly and can stick or burn when the skillet is too hot.
Add butter or oil
A thin layer helps reduce direct contact between the egg and the cooking surface.
Use a flexible spatula
A suitable spatula helps lift eggs without damaging the food.
Can You Cook Tomatoes and Other Acidic Foods?
You can cook acidic foods in well-seasoned cast iron, but long cooking times may affect the seasoning and food flavor. Tomatoes, vinegar, lemon juice, and wine are common acidic ingredients.
For a new or poorly seasoned pan, choose another suitable pan for long-simmered tomato sauce or dishes with a lot of lemon juice. A short cooking process with acidic ingredients may be manageable in a mature, well-seasoned skillet.
There is no single cooking time that guarantees the seasoning will remain unchanged. The acidity, recipe, pan condition, and cooking time all matter. If you plan to simmer an acidic sauce for a long period, stainless steel or enameled cast iron is often a better option.
Short acidic cooking
May be suitable in a mature, well-seasoned pan.
Long tomato simmer
Better suited to stainless steel or enameled cast iron.
Metallic flavor
If food develops an unusual metallic taste, stop using the pan for that recipe and review its seasoning condition.
6. How to Clean Cast Iron Cookware After Cooking
Cleaning cast iron is simple when you follow three basic steps: wash, dry, and oil. You do not need to leave grease or food residue in the pan to protect its seasoning. A clean cooking surface is easier to maintain and ready for the next meal.
Let the pan cool enough to handle safely before washing. Do not pour cold water into extremely hot cast iron. A sudden temperature change can cause thermal stress and may crack or damage the cookware.
Modern mild dish soap is safe for properly seasoned cast iron. The idea that any soap destroys seasoning is an old kitchen myth. Avoid harsh cleaning methods for routine care, but do not be afraid to clean the pan properly.
Source: i.ytimg.com
Warm water
Rinse away loose food and grease.
Mild soap
Use a small amount when the pan needs a more complete wash.
Scrub gently
Use a soft sponge, nylon brush, or pan scraper for stuck food.
Dry immediately
Remove moisture from the cooking surface, bottom, sides, and handle.
Apply a little oil
Rub on a very thin layer after drying if needed to maintain the protective surface.
How to Remove Stuck Food
If food sticks to the cooking surface, do not immediately reach for strong chemicals or harsh cleaners. Add a little water to the pan and bring it to a gentle simmer for a few minutes. This can loosen cooked-on food.
Allow the pan to cool enough for safe handling. Use a pan scraper, stiff nylon brush, or suitable scrubber to remove the remaining material. Rinse the pan and dry it completely.
For stubborn residue, a small amount of coarse salt can provide gentle abrasion. Rub it carefully with a paper towel or cloth, then rinse and dry the pan. If the surface becomes damaged, consider reseasoning.
Water simmer
Helps soften stuck food so it can be removed more easily.
Nylon brush
Useful for routine scrubbing without aggressive abrasion.
Pan scraper
Helps lift stubborn food from the cooking surface.
Coarse salt
Can help remove residue when used with gentle pressure.
Why You Should Never Leave Cast Iron Wet
Traditional cast iron can rust when moisture remains on its surface. Even a small amount of water trapped around the handle, rim, or underside can lead to orange spots over time.
After washing, dry the pan with a clean towel. You can also place it over low heat briefly to remove hidden moisture. Let it cool safely before applying a thin layer of oil.
Do not leave cast iron soaking in the sink overnight. Avoid dishwashers because their long wash and drying cycles can damage the seasoning and expose the iron to moisture.
Never soak
Long contact with water increases the chance of rust.
Avoid the dishwasher
Hand washing is the better choice for traditional seasoned cast iron.
Dry all surfaces
Pay attention to the bottom, handle, and edges.
7. How to Store Cast Iron Cookware Correctly
Store cast iron in a clean, dry place with enough airflow to prevent moisture buildup. A kitchen cabinet, dry pantry shelf, or cookware rack can work well. The main goal is to keep water away from the iron.
Before storing the pan, make sure it is completely dry. Apply a very thin coat of cooking oil if the care instructions recommend it. The surface should look lightly protected, not wet or greasy.
If you stack cast iron skillets, place a paper towel or suitable pan protector between them. This helps protect the seasoning and allows air to move around the cookware.
Source: freetoflower.com
Choose a dry location
Avoid damp cabinets, wet sinks, and areas with regular condensation.
Protect the cooking surface
Use a clean paper towel or pan separator when stacking cookware.
Allow airflow
Avoid tightly covering damp cookware or trapping moisture under a lid.
Check occasionally
Inspect stored cookware for rust, excess oil, and signs of moisture.
Should You Put Oil on Cast Iron Before Storage?
A very thin layer of cooking oil can help protect the iron from moisture. Use a clean paper towel to spread the oil over the surface and then wipe away any visible excess.
Too much oil can become sticky or develop an unpleasant smell during storage. A pan that feels greasy needs less oil, not more. Proper drying is more important than applying a thick coating.
Use a small amount
A thin film is enough for routine storage protection.
Wipe off excess
The pan should feel nearly dry rather than oily.
8. Common Cast Iron Cooking Problems and How to Fix Them
Most cast iron problems are related to heat, excess oil, moisture, or damaged seasoning. A pan that sticks, rusts, or feels greasy is not necessarily ruined. Many common problems can be corrected with simple cleaning and maintenance.
Before trying to repair a pan, identify the actual problem. Adding more oil will not fix every issue. For example, a pan that sticks because it is too hot needs better temperature control, not another layer of seasoning.
Source: freetoflower.com
Food sticks to the surface
Check the preheating method, cooking temperature, amount of oil, and condition of the seasoning.
Orange rust appears
Remove loose rust, wash, dry, apply a thin oil layer, and reseason if necessary.
The pan feels sticky
Too much oil or an improperly baked seasoning layer may be the cause.
Seasoning looks uneven
Minor color changes are normal and do not always require repair.
Problem 1: Food Keeps Sticking
Food can stick when the pan is too cold, too hot, poorly seasoned, or lacking enough cooking fat. Delicate foods such as eggs are especially sensitive to temperature and surface condition.
Start by reducing the burner setting and giving the pan enough time to warm gradually. Add a little oil or butter before adding food. If the pan still causes persistent sticking, clean it and check the seasoning.
For meat, avoid turning it too early. A browned crust often releases more easily than food that is moved before the surface has developed.
Likely cause: Incorrect heat
Use gradual preheating and moderate temperatures.
Likely cause: Poor seasoning
Clean the pan and consider applying a fresh seasoning layer.
Likely cause: Too little oil
Add a suitable amount of cooking fat before adding food.
Problem 2: Rust Appears on the Pan
Rust develops when iron is exposed to moisture and oxygen. It may appear if you leave the pan wet, store it in a damp place, or allow food and water to remain on the surface for too long.
For light surface rust, scrub the affected area with steel wool or a suitable abrasive scrubber. Wash away the residue, dry the pan fully, and apply a thin layer of oil.
If the rust has damaged the seasoning, complete an oven seasoning cycle using the manufacturer’s recommended temperature. If the cookware is deeply pitted, cracked, or structurally damaged, stop using it until its condition has been properly assessed.
Remove rust
Scrub the affected area until loose rust is gone.
Wash and dry
Remove all remaining debris and moisture.
Restore seasoning
Apply a thin layer of suitable oil and use the recommended oven method.
Problem 3: The Pan Feels Sticky After Seasoning
A sticky surface usually means too much oil was left on the pan or the seasoning process did not work as intended. The oil may have formed a tacky layer instead of a smooth, hardened coating.
Clean the pan with warm water and mild dish soap. Remove loose or sticky residue, dry it fully, and repeat the seasoning process using much less oil.
The key is to wipe away almost all visible oil before placing the pan in the oven. A thin, even film is better than a thick coating.
Avoid thick oil layers
Use only enough oil to leave a very thin film.
Follow the temperature guide
Use the manufacturer’s recommended oven temperature and heating time.
Allow proper cooling
Let the cookware cool before checking its surface.
Problem 4: Black Residue Appears During Cleaning
A little dark residue on a paper towel does not always mean the pan is unsafe or damaged. It may come from seasoning, food residue, or cooking buildup.
Wash the pan with warm water and mild dish soap. If the residue is loose and continues to come away in large amounts, inspect the surface for flaking seasoning or old food deposits.
Remove loose flakes, dry the cookware, and reseason if needed. A stable seasoning layer should not continually shed large pieces during normal cleaning.
Small amount of residue
Clean normally and monitor the surface.
Large flakes
Remove loose material and rebuild the seasoning if necessary.
Problem 5: The Pan Heats Unevenly
Cast iron can develop hot spots when it is heated too quickly or used on a burner that is much smaller than its base. This can cause one area to burn food while another area remains cooler.
Use a suitably sized burner and allow more time for gradual heating. Avoid sudden temperature changes and do not place an extremely hot pan directly under cold running water.
If the pan is visibly warped or cracked, stop using it. Normal uneven heating can often be managed through better burner selection and temperature control, but physical damage requires a different response.
Match the burner
Choose a heat source that fits the pan base.
Heat gradually
Avoid sudden, intense heat in one small area.
Inspect for damage
Do not continue cooking with cracked or structurally damaged cookware.
9. Important Safety Tips for Using Cast Iron
Cast iron is durable, but its weight and heat retention require care. The handle can become as hot as the pan, and the cookware may remain hot long after you remove it from the stove.
Use dry oven mitts or suitable heat-resistant gloves when moving hot cookware. Wet cloths can transfer heat quickly and cause burns. Keep children away from hot skillets and place the pan where it cannot be knocked off the stove.
You should also avoid sudden temperature changes. Never pour cold water into a very hot pan or place extremely hot cast iron on a cold, wet surface. Thermal shock can cause damage, and a hot pan may also crack if exposed to a sharp temperature change.
Source: i.ytimg.com
Protect your hands
Always treat the handle as hot, even when it looks cool.
Avoid thermal shock
Allow the pan to cool before washing it with water.
Check the cookware
Inspect the pan for cracks, loose parts, or serious damage before use.
Use a stable surface
Set hot cast iron on a heat-resistant trivet or suitable countertop protector.
Can Cast Iron Add Iron to Food?
Yes. Cooking in cast iron can increase the iron content of some foods. However, the amount varies with the food, cooking time, moisture, acidity, and condition of the cookware.
This does not mean cast iron is a reliable treatment for iron deficiency or a substitute for medical care. The amount of iron transferred is not consistent enough to use the pan as a precise source of dietary iron.
People who need to manage their iron intake should discuss their dietary needs with a qualified healthcare professional rather than relying on cookware choices alone.
Food type matters
Different ingredients can absorb different amounts of iron.
Cooking time matters
Longer cooking can change the amount of iron transferred.
Health needs vary
Cast iron cooking should not replace professional advice about iron intake.
Can You Use Cast Iron on a Glass-Top Stove?
Yes, many traditional cast iron pans can be used on glass-top electric stoves, but you must handle them carefully. Cast iron is heavy, and dragging it across a glass surface can cause scratches.
Lift the pan rather than sliding it. Check that the bottom is reasonably smooth and clean, and avoid dropping the cookware onto the glass. Use gradual heating to reduce thermal stress.
Follow the cooktop manufacturer’s instructions. Some cooktop makers may provide specific limits or handling advice for heavy cookware.
Lift instead of dragging
This helps reduce the risk of scratches on the glass.
Check the base
Remove loose food and rough debris that could damage the cooktop.
Avoid sudden heating
Increase the temperature gradually.
10. Cast Iron Cooking Temperature and Food Guide
The right cooking temperature depends on the food, the thickness of the pan, and your stove. Cast iron holds heat well, so moderate settings are often enough for everyday meals.
The following table provides general starting points for stovetop cooking. These are not fixed temperature readings or universal burner settings. Adjust the heat based on how quickly the food browns and how your particular stove performs.
Source: redandhoney.com
Low heat
Useful for delicate eggs, gentle warming, and cooking that needs careful temperature control.
Medium-low heat
A practical starting point for pancakes, eggs, and many everyday dishes.
Medium heat
Useful for vegetables, sautéing, and general stovetop cooking.
Medium-high heat
Can help brown meat and develop a crust when the pan is properly preheated.
High heat
Use only when the recipe and cookware allow it. Avoid prolonged maximum heat and excessive oil smoking.
Suggested Starting Heat by Food
Use this guide to choose a starting burner setting. You may need to make small adjustments during cooking because cast iron continues to hold heat even after the burner is turned down.
Fried eggs
Low to medium-low heat with butter or oil.
Pancakes
Medium-low heat to help prevent burnt surfaces.
Sautéed vegetables
Medium heat, adjusted to the amount of moisture in the vegetables.
Chicken pieces
Medium heat for browning, followed by suitable lower heat or oven cooking to finish.
Steak
A properly preheated skillet with suitable higher heat for searing.
Cornbread
Follow the recipe’s oven temperature and preheating directions.
11. Cast Iron Cookware Maintenance Checklist
A simple routine is the easiest way to keep cast iron in good condition. You do not need to reseason the pan after every meal, but you should clean it, dry it, and check its surface before storage.
The following checklist separates everyday care from occasional maintenance. It helps prevent small issues from turning into larger problems.
Source: sharonpalmer.com
Before cooking
Check the surface, confirm that the pan is clean and dry, and inspect the handle.
During cooking
Preheat slowly, use suitable oil, and adjust the burner to control browning.
After cooking
Allow the pan to cool safely, remove food, and wash it by hand.
Before storage
Dry every surface and apply a very thin coat of oil if appropriate.
Occasional maintenance
Inspect the seasoning, remove rust when necessary, and reseason damaged areas.
A Simple Daily Care Routine
After breakfast or dinner, let the skillet cool until it is safe to wash. Remove food, rinse with warm water, and use mild soap if needed. Dry it completely with a clean towel.
If the pan needs extra drying, place it over low heat for a short time. Once it is dry, wipe on a very thin layer of oil and remove any visible excess.
Store the skillet in a dry location. This routine takes only a few minutes and helps maintain the protective seasoning.
Clean
Remove grease, food, and loose residue.
Dry
Prevent moisture from remaining on the iron.
Protect
Maintain the seasoning with a light oil film when needed.
Store
Keep the pan in a dry place with enough airflow.
Frequently Asked Questions
Q
Do You Need to Wash Cast Iron After Every Use?
Yes. You should clean cast iron after each use to remove food, grease, and residue. Use warm water and mild dish soap when needed. Dry the cookware completely before storing it.
Leaving food and moisture in the pan can lead to odors, buildup, and rust. A clean, dry surface is easier to maintain than one covered in leftover cooking grease.
Q
Can You Use Dish Soap on Cast Iron Cookware?
Yes. Modern mild dish soap is safe for properly seasoned cast iron. A small amount will not normally remove the hardened seasoning layer.
Wash the pan with warm water, rinse it well, and dry it completely. Avoid harsh cleaning chemicals and prolonged soaking.
Q
Can You Use Cast Iron Every Day?
Yes. You can use cast iron daily if it suits your cooking needs. Regular cooking with suitable oils can help maintain its seasoning.
Just remember to control the heat, clean the pan after meals, dry it thoroughly, and store it in a dry location.
Q
Why Does Food Stick to My Cast Iron Skillet?
Food may stick because the pan is too cold, too hot, poorly seasoned, or missing enough cooking oil. Delicate foods such as eggs need extra attention.
Try gradual preheating, moderate heat, and a small amount of butter or oil. If the problem continues, clean the pan and inspect its seasoning.
Q
Can You Put Cast Iron Cookware in the Oven?
Most traditional cast iron cookware can be used in the oven. It is useful for cornbread, roasted vegetables, baked dishes, and recipes that begin on the stovetop.
However, check the manufacturer’s temperature limits before use. Lids, handles, and knobs may have different heat limits from the main pan.
Q
Is It Safe to Cook Acidic Foods in Cast Iron?
It depends on the pan’s seasoning and the cooking time. A well-seasoned skillet may handle short cooking periods with acidic ingredients, but long simmering can weaken the seasoning and give food a metallic taste.
For long-cooked tomato sauces, vinegar-based dishes, or recipes with plenty of lemon juice, stainless steel or enameled cast iron is often a better option.
Q
What Is the Best Oil for Cast Iron Cookware?
Vegetable oil and canola oil are common options for cooking and seasoning cast iron. Other suitable cooking oils can also work when their smoke points match the cooking temperature.
For oven seasoning, choose a neutral oil with a suitable high smoke point. Apply only a thin layer and wipe away excess oil before heating.
Q
How Do You Know When Cast Iron Needs Reseasoning?
Signs include persistent sticking, exposed bare iron, rust, or a damaged and flaking protective coating. A dull or uneven color alone does not always mean the pan needs reseasoning.
Clean and dry the pan first. If the seasoning is damaged, apply a very thin oil layer and follow the manufacturer’s oven seasoning instructions.
Q
Can You Use Metal Utensils on Cast Iron?
Yes. Traditional bare cast iron can generally handle metal utensils. A metal spatula can be useful for turning burgers, lifting food, and scraping loose cooking residue.
Use reasonable pressure and avoid forceful scraping that removes large pieces of seasoning. Follow different instructions for enameled cast iron, which has a separate glass-like cooking surface.
Q
Can Cast Iron Cookware Be Used on Induction?
Yes. Traditional cast iron is magnetic and is generally compatible with induction cooktops. However, its weight and rough surface require careful handling.
Lift the cookware instead of sliding it across the cooktop. Start with moderate heat and follow the cooktop manufacturer’s instructions.
✦ Wrapping Up
Conclusion
Learning how to use cast iron cookware does not require complicated techniques. Start with a clean, seasoned pan, warm it slowly, add a little cooking oil, and give food enough time to brown before moving it. These simple habits can improve cooking results and help protect the surface.
After each meal, clean the pan by hand, remove all moisture, and apply a very thin layer of oil when needed. Store it in a dry place and inspect it from time to time. If rust or damaged seasoning appears, most minor problems can be repaired with careful cleaning and reseasoning.
Cast iron may need more care than a modern nonstick pan, but its heat retention, versatility, and long service life make it useful in many American kitchens. Once you understand how it heats and how to maintain its seasoning, it becomes a practical tool for everyday meals.
💡 Key Takeaway
Start with a pre-seasoned cast iron skillet, wash and dry it, preheat it slowly over medium-low heat, add a little cooking oil, and prepare a simple meal such as vegetables, potatoes, or cornbread. After cooking, wash, dry, and lightly oil the pan. Repeat this routine to build good cooking habits and maintain its protective seasoning.