
Ever wondered what the dehydrate setting on your air fryer is actually for, beyond just cooking food at a lower temperature? It’s a fantastic function that unlocks a world of healthy snacks and preserved ingredients right in your kitchen. Our research confirms that understanding this setting means tapping into your appliance's versatility for more than just crisping fries.
Manufacturer specifications often highlight this feature, which operates quite differently from regular air frying. While standard air frying typically uses high heat to cook and crisp, the dehydrate mode focuses on removing moisture from food over extended periods at much lower temperatures. Per Food and Drug Administration (FDA) guidelines, proper food dehydration requires specific temperature ranges to ensure safety and prevent spoilage, a critical point your air fryer's dehydrate function aims to meet. This gentle, prolonged process doesn't cook in the traditional sense but rather dries food out, making it perfect for creating shelf-stable items.
Quick Insight: Air Fryer Dehydrating Explained
Simply put, the dehydrate setting on an air fryer mimics a low-heat, high-air-circulation oven designed specifically for removing moisture from foods to preserve them or create certain textures. It's not about cooking or browning, but about gently drying ingredients like fruits, vegetables, or meats over several hours. Think of it as a mini-dehydrator built right into your air fryer, offering a convenient way to make snacks and save money.
Core Explanation: How Air Fryers Dehydrate Food
At its heart, food dehydration is all about moisture removal. When you use your air fryer’s dehydrate setting, it’s programmed to maintain a consistently low temperature, typically between 100°F and 160°F (40°C to 70°C), although specific ranges vary by model. This low heat is crucial because it dries the food without cooking it through, which would change its texture and nutritional profile.
Understanding Low Temps and Airflow
The combination of low temperature and consistent air circulation is what makes dehydration work. The hot air circulating inside the air fryer constantly evaporates the surface moisture from the food. Over time, this process draws moisture out from the food's core, making it dry and shelf-stable. Unlike baking or roasting, where heat cooks food, dehydration is a slow evaporation process.
It's a principle widely applied in food preservation, with many dedicated dehydrators employing similar fan and heating technologies.
Your Air Fryer Dehydrate Workflow: A Step-by-Step Guide
Using your air fryer to dehydrate food involves a few key steps to ensure you get the best, safest results. It starts with proper food preparation and ends with smart storage to keep your dried goods fresh. Our research indicates following a general workflow greatly reduces common issues.

1. Food Prep: Slicing and Getting Ready
First, gather your ingredients. Wash all produce thoroughly. For fruits like apples or bananas, remove cores, pits, and any blemishes. Slice your food uniformly, aiming for thin, even pieces, usually between 1/8 to 1/4 inch thick.
Uniformity is key for even drying. Thicker slices take much longer and might not dry out completely, while very thin ones can dry too quickly and burn.
2. Arranging Food for Best Results
Once sliced, arrange your food in a single layer inside the air fryer basket or on its trays. Don't overcrowd the space. Proper spacing allows air to circulate freely around each piece, which is essential for efficient moisture removal. If your air fryer came with multi-level racks, use them to maximize capacity, but ensure there’s still room for air to move.
3. Setting Your Air Fryer: Temp and Time Dance
This is where the dehydrate function comes into play. Select the dehydrate setting on your air fryer. You'll then need to set the temperature and time. Consult your air fryer’s manual or reliable dehydration charts for recommended temperatures and approximate drying times for specific foods.
For instance, fruits often dry well around 135°F (57°C), while jerky might require a slightly higher temperature in some recipes for food safety, closer to 160°F (71°C). Drying times can range anywhere from 4 to 12 hours, or even longer, depending on the food and thickness.
4. Checking and Rotating for Evenness
Midway through the drying process, it’s a good idea to check your food. You might need to rotate trays or flip pieces to ensure even dehydration. Airflow can vary within the air fryer, and checking helps catch any spots that are drying faster or slower than others. This also allows you to feel the texture, when done, food should be leathery or brittle, depending on what you’re making, with no residual moisture.
When to Use Your Air Fryer's Dehydrate Function: Top Use Cases
Your air fryer’s dehydrate setting opens up a world of possibilities beyond everyday cooking. It’s particularly useful for creating specific types of snacks and preserving ingredients, offering a healthier and often more economical alternative to store-bought options.
Making Crispy Fruit Chips
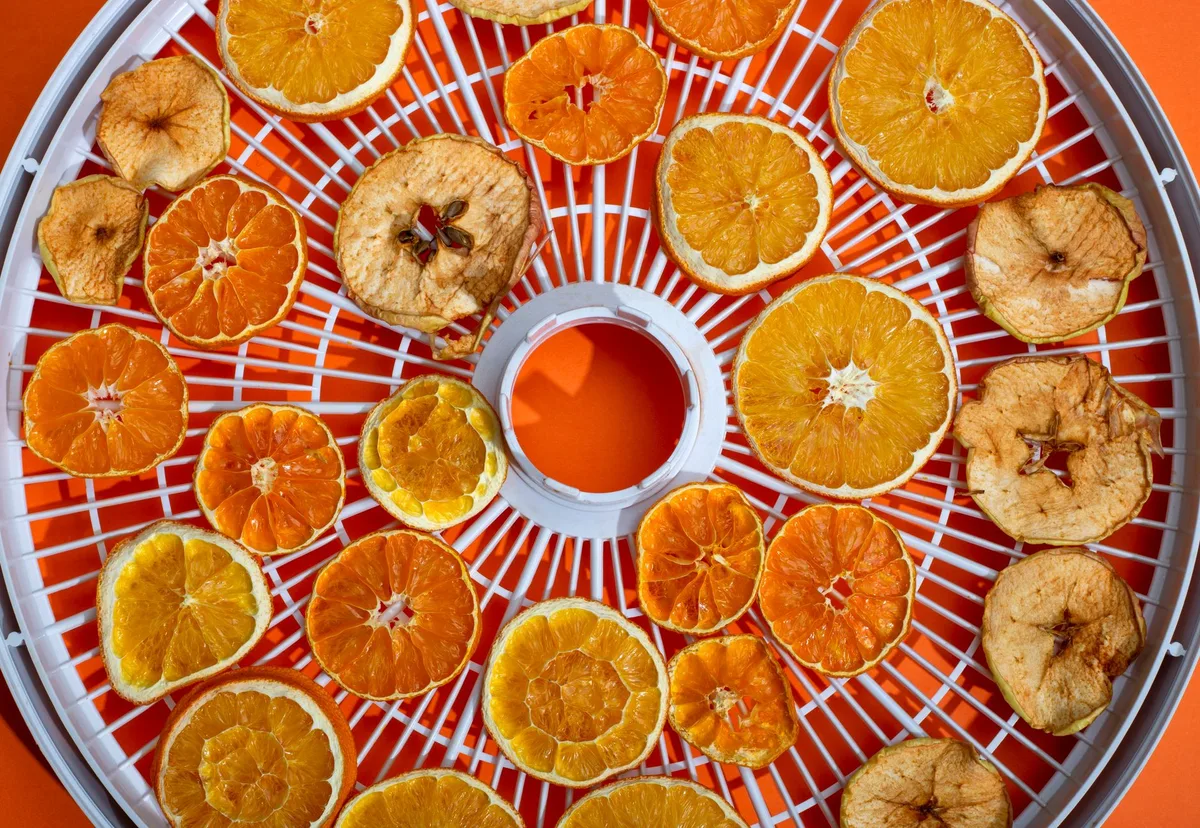
This is perhaps the most popular use for an air fryer’s dehydrate function. Think thin slices of apples, bananas, mangoes, or even citrus fruits. When properly dehydrated, they become wonderfully crispy and naturally sweet, perfect for a healthy snack. You can achieve a great texture that rivals commercially made fruit chips, but without added sugars or preservatives.
Crafting Homemade Beef Jerky
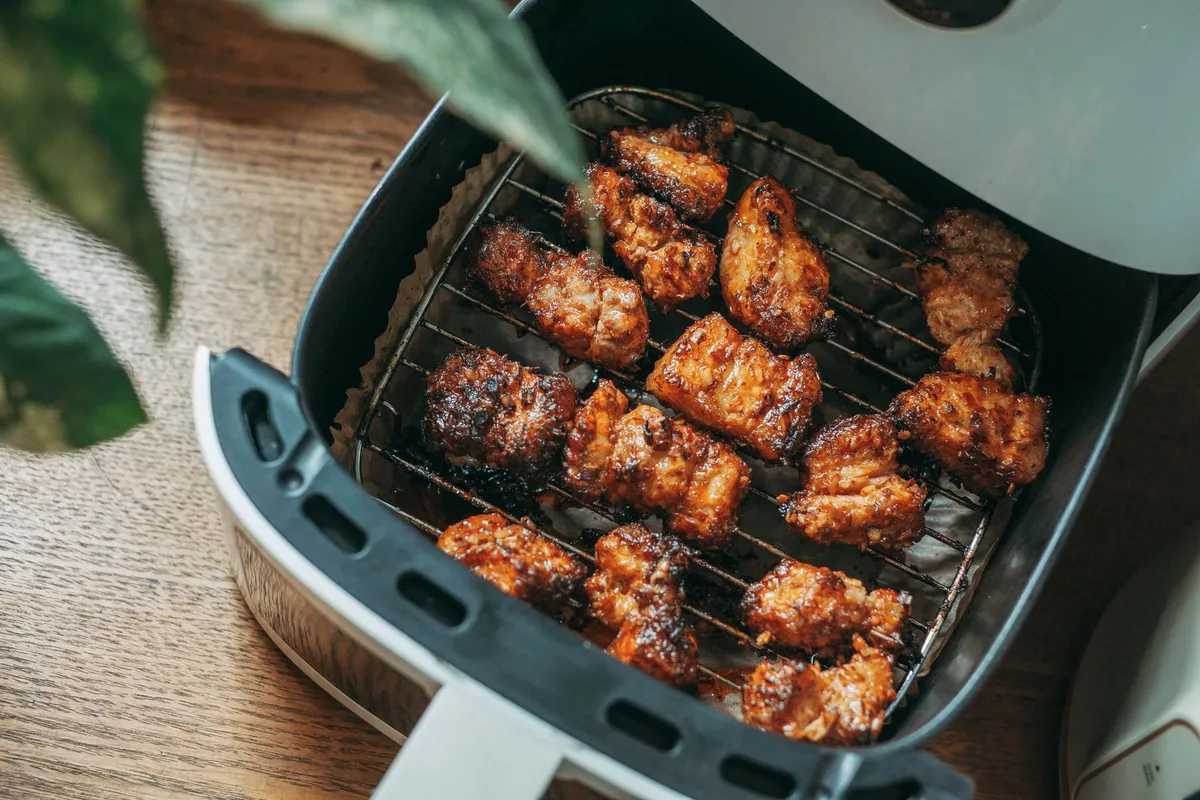
Dehydrating is the core process for making beef jerky. Using the low-and-slow dehydrate mode in your air fryer allows you to transform thinly sliced, marinated beef into flavorful, chewy jerky. This is a fantastic way to control the ingredients, marinades, and spice levels, making it both a cost-effective and customized snack. Always ensure you use meat that is safe for low-temperature drying and follow recipe guidelines closely to avoid any food safety concerns.
Preserving Herbs and Spices
Gardeners and home cooks can leverage this setting to dry fresh herbs like basil, oregano, or mint. Instead of letting them wilt, you can gently dehydrate them to preserve their flavor and aroma for later use in cooking. This process concentrates their essential oils, resulting in potent dried herbs that add a burst of flavor to your dishes. This is a great way to extend the life of your garden bounty.
Air Fryer Dehydrating vs. Dedicated Dehydrators: What's the Difference?
While your air fryer can handle dehydration, it's useful to understand how it stacks up against a dedicated food dehydrator. Dedicated dehydrators are built solely for the purpose of drying food and often offer more advanced features and larger capacities.
- Capacity: Dedicated dehydrators typically have multiple trays stacked vertically, allowing for larger batches of food to be dried simultaneously. Most air fryers have a single basket or a small set of trays.
- Temperature Control: While air fryers offer a dehydrate mode, dedicated dehydrators often provide a wider range of precise temperature settings, allowing for more fine-tuning based on specific food types. For example, some models might offer settings as low as 90°F (32°C) for delicate items like herbs.
- Air Circulation: Dedicated units are specifically engineered for optimal, even airflow throughout the entire drying chamber. Air fryers rely on their existing fan and heating element, which might create more hot spots or less consistent results compared to a specialized unit.
- Time: Air fryers can take longer to dehydrate larger quantities due to their limited capacity, and the process might be less efficient than a purpose-built unit.
However, if you're new to dehydrating or only need to dry small batches occasionally, using your air fryer’s dehydrate setting is a convenient and space-saving option that requires no additional appliance purchase.
Common Mistakes When Dehydrating in an Air Fryer
Getting dehydration right in an air fryer is a bit of an art, and it’s easy to stumble into common pitfalls. Avoiding these can save you time, food, and frustration.
Over-Drying vs. Under-Drying Risks
The biggest challenge is hitting that sweet spot between perfectly dried and ruined. Over-drying leads to food that’s too brittle, chalky, and flavorless. Under-drying means the food still contains too much moisture, which can lead to spoilage, mold, or a chewy texture when you were aiming for crisp. This is why checking food periodically and understanding the desired final texture for each item is so important.
Temperature Troubles and Time Traps
Using the wrong temperature is a frequent mistake. Too high, and you might cook the food instead of drying it, changing its texture and potentially encouraging spoilage if not fully cooked and then stored improperly. Too low, and the dehydration process takes excessively long, or worse, can encourage bacterial growth. Time is also a major factor; assuming a set time from a recipe without checking the food's actual dryness is a common error.
Drying times can vary significantly based on humidity, ambient temperature, and how full your air fryer basket is.
Key Food Safety Tips for Air Fryer Dehydration
When you're dehydrating food, especially items like meats or foods with higher moisture content, food safety is paramount. The goal is to remove enough water to prevent the growth of bacteria, yeasts, and molds.
- Use Fresh, High-Quality Ingredients: Start with the freshest produce or leanest cuts of meat you can find. Contamination can occur before the drying process even begins.
- Achieve Proper Temperatures: As noted by the FDA, maintaining an internal food temperature of at least 145°F (63°C) for meats is recommended before using a dehydrator. While air fryer dehydrate modes are lower, this is crucial for initial meat safety. For fruits and vegetables, temperatures typically between 130-140°F (54-60°C) are sufficient to prevent spoilage once most moisture is removed.
- Check for Doneness: Foods should be dry to the touch and feel leathery or brittle. If you’re unsure, it’s better to err on the side of caution and dry for longer.
- Cool Foods Completely: Before storing, ensure all dehydrated foods are completely cooled to room temperature. Warm foods can create condensation in storage containers, leading to mold growth.
- Store Properly: Use airtight containers, vacuum-sealed bags, or glass jars. Store dried foods in a cool, dark, and dry place. Regularly check stored items for any signs of spoilage.
Pro Tips for Better Dried Foods from Your Air Fryer
Beyond the basic workflow, a few expert insights can elevate your air fryer dehydration game. These tips are about maximizing flavor, texture, and efficiency.
- Pre-Treat Fruits: For fruits prone to browning, like apples or bananas, a quick dip in a solution of lemon juice and water (about 1 tablespoon per cup of water) can help prevent oxidation and maintain a more appealing color. This is a classic preservation technique for produce.
- Marinate Meats Properly for Jerky: When making jerky, ensure your marinade is well-distributed and has time to penetrate the meat. Reserve some marinade to brush on during the drying process if you want extra flavor, but always ensure the meat is dried to a safe level.
- Don't Forget About Herbs: For drying herbs, consider "flashing" them in a very hot oven for just a minute (then proceed to dehydrate) to help set their colors and flavors before the longer drying process. This is a trick professional chefs sometimes use with sensitive greens.
- Consider Your Air Fryer's Limitations: As mentioned, air fryers aren't dedicated dehydrators. If you plan to dehydrate frequently or in large batches, investing in a dedicated appliance might be more efficient in the long run. It's about matching the tool to the task.
This is a great place to think about what kind of kitchen setup you have. If you're dealing with limited countertop space, an air fryer is definitely more practical than a bulky dehydrator.
Troubleshooting Common Dehydration Issues
Even with careful preparation, you might run into a few hiccups. Here's how to address some of the most common dehydrating problems when using your air fryer.
Uneven Drying
If some pieces are dry while others are still moist, it's usually an airflow issue. Ensure food is in a single layer with adequate spacing. If using trays, rotate them. If using a basket, try rearranging food halfway through.
For very large items, consider cutting them smaller.
Food Sticks to Trays/Basket
Sometimes, delicate foods can adhere to the surface as they dry. Line your air fryer basket or trays with parchment paper (ensure it’s safe for your air fryer's temperature range) or silicone dehydrating mats. Some recipes also recommend lightly oiling the surface, particularly for meats, though this can add fat.
Food Spoils or Molds
This is a serious issue and almost always points to insufficient drying or improper storage. Double-check your drying time and temperature. Ensure food is completely dry before storing. If you see any signs of mold or spoilage upon checking or storage, discard the affected batch immediately.
This underscores the importance of food safety in dehydration.
Does Air Fryer Dehydrating Save Money?
For many, the appeal of air fryer dehydration lies in its potential cost savings. When you compare the price of homemade dried fruit or jerky to their store-bought counterparts, the difference can be significant over time.
- Ingredient Cost: Buying produce or meat in bulk when on sale can drastically reduce your raw material costs. This is especially true for items like dried mango or beef jerky, which are often premium-priced in stores.
- Reduced Food Waste: Dehydrating helps preserve foods that might otherwise spoil before you can use them. This turns potentially wasted groceries into usable snacks, effectively saving you money that would have been thrown away.
- No Electricity Hogging: While it uses electricity, an air fryer's dehydrate mode is generally more energy-efficient than running a full-sized oven on a low setting for many hours. Dedicated dehydrators are also designed for low energy consumption over long periods.
However, the initial investment in your air fryer (if you don't already have one) and the cost of electricity should be factored in. For occasional use, the savings might be modest, but for frequent dehydrators, the economic benefits quickly add up.
Is It Cheaper Than Buying?
Aggregate user reviews suggest that for regular snackers who consume large quantities of dried goods, making them at home with an air fryer can indeed be cheaper. For example, a pound of beef jerky can cost $20-$30 or more in stores, while the meat to make it at home might cost half that, plus your time and energy. Similarly, premium dried fruit can be pricey, making DIY options attractive.
What Foods Can I Dehydrate in My Air Fryer?
The versatility of the dehydrate function is one of its biggest draws. Nearly any food that can be traditionally dehydrated is a candidate for your air fryer, though batch size is a consideration.
- Fruits: Apples, bananas, strawberries, blueberries, mangoes, pineapple, citrus slices, apricots, and peaches are all excellent choices.
- Vegetables: Zucchini, tomatoes, bell peppers, carrots, and mushrooms can be dried for use in soups, stews, or as snacks.
- Herbs: Parsley, cilantro, basil, mint, rosemary, and thyme dry beautifully, retaining much of their aromatic oils.
- Meats: Lean beef, turkey, or venison can be made into jerky. Ensure you follow food safety guidelines meticulously for these items.
- Other: Some people have success dehydrating pet treats, fruit leathers (by pureeing fruit and spreading thinly), and even spices.
Can I Make What Looks Like Store-Bought Dried Produce?
Yes, often you can achieve similar results. The key is consistent thin slicing and proper drying to achieve the desired texture, whether that's crisp like an apple chip or leathery like jerky.
Storing Your Dehydrated Foods for Maximum Shelf Life
Proper storage is just as critical as the dehydration process itself. Even perfectly dried foods can degrade or spoil if not stored correctly. The enemy here is moisture and air.
- Airtight Containers: Use glass jars with tight-fitting lids, food-grade plastic containers with seals, or vacuum-sealed bags. These create a barrier against humidity.
- Cool, Dark, Dry Place: Store containers in a pantry or cupboard away from direct sunlight and heat sources. A consistent, cool temperature is best.
- Check for Condensation: Periodically inspect your stored items. If you notice any condensation inside the container, it means there’s still residual moisture, and the food may not be safe.
- Label and Date: Always label your containers with the contents and the date of dehydration. This helps you track freshness and use older batches first. Most properly dried foods can last for several months, or even up to a year, under ideal storage conditions.